Images can be embedded into pages and posts and each image can link to another webpage or document. If you wish to create a link using an image instead of text, you can do one of the following:
Linking the image to an external page/site
- Enter your page’s/post’s Edit view or create a new page/post
- Click on the “Add Media” button found above the editor toolbar

If you have already uploaded the image and it’s in the entry field, skip to step #4
3. Next, you can either upload the image from your computer or select it from the Media Library if it’s already there
- From your device:
- In the “Add Media” window, under the “Upload Files” tab, click on the “Select Files” button and choose the image you wish to upload from your computer
- After the image has been loaded, the tab should expand with attachment details.

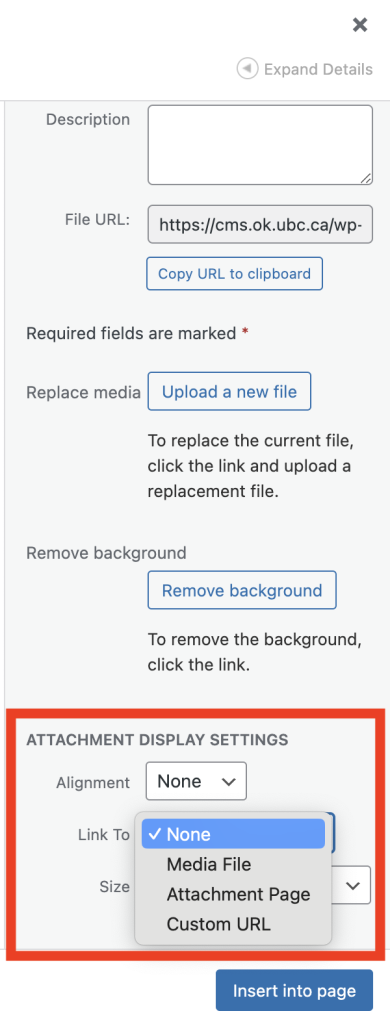
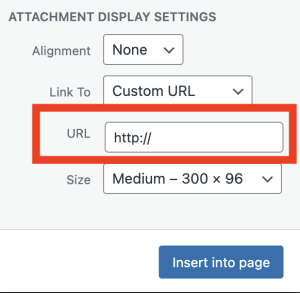
- In the ‘Attachment Display Settings’ section, click on the drop-down menu next to the label ‘Link To‘ and choose ‘Custom URL‘
- Enter the destination website or page address in the text field that appears below and press ‘Insert into page‘ button (this will also add the image into the Media Library if you wish to insert the same image into a different page/post)

- From Media Library:
- In the “Add Media” window, under the “Media Library” tab, browse through all the files (or search using the “Search Media” bar) and click on the desired image
- Then follow steps #3 & #4 from above.
Linking the image to a page/post within the site
- Enter your page’s/post’s Edit view or create a new page/post
- Click on the “Add Media” button found above the editor toolbar
- Choose the desired image from the Add Media screen, and press the “Insert into page” button
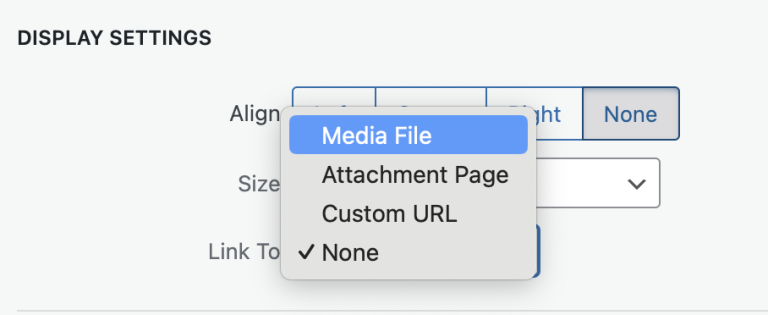
- Click on the image, press the Pencil icon on the toolbar, a Display Setting section will appear.

- In the Link To box, you can either mention a Custom URL or link to an existing attachment Page using the drop-down below.

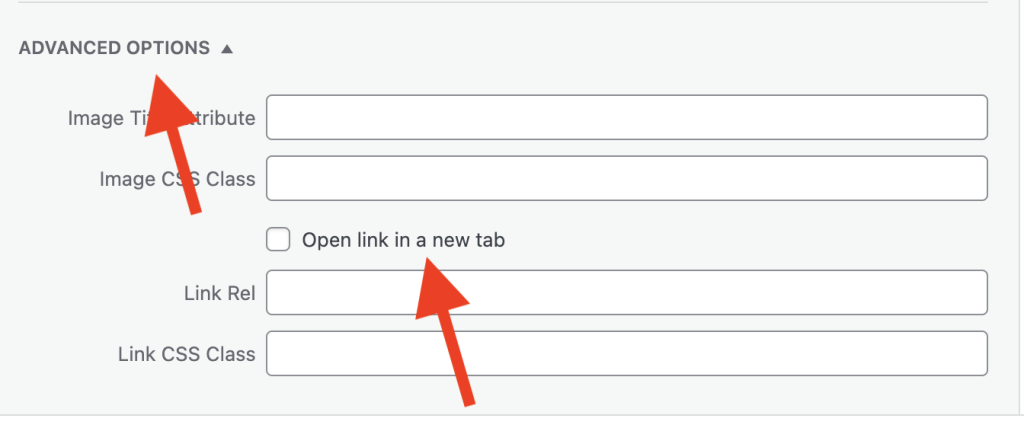
- If you wish for the link to open in a new page, choose the “Open link in a new window” from Advanced Options.

- press Update button.