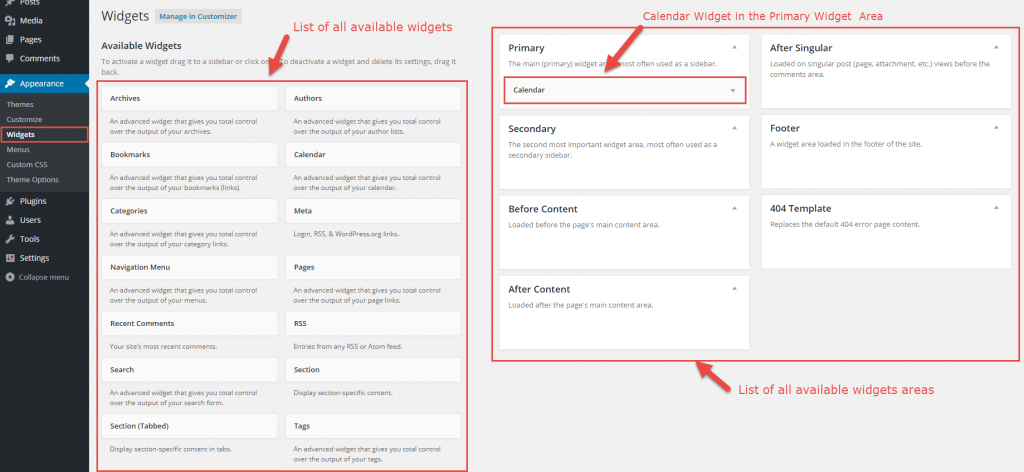
In the most general sense, a widget is a piece of ‘stand-alone’ functionality that can be installed on a website by the user, usually without any coding being required by that user.
In WordPress systems such as UBC Blogs and UBC CMS, widgets refer to tools or content that you can add, arrange, and remove from the sidebars of a blog. These tools and content can usually be customized by the website’s manager.
Popular widgets include;
- Search – which creates a box allowing for full-text search of the contents of the blog
- Archives – providing links to older post entries
- Links – to manage hyperlinks to other websites
- Text – gives you an editor for rich/visual text editing.
- Custom HTML – use this widget where arbitrary HTML needs to be displayed, such as a signup form or a 3rd party JavaScript widget.
Managing Widgets
Widgets are installed, removed, and configured from the Dashboard interface. The Widgets page can be accessed by clicking on the “Widgets” link under “Appearance” on the left-hand sidebar.
To install a widget, you “drag” the widget you want (select with the mouse, click and hold), and “drop” it on the sidebar (move widget over, release the mouse button). You can rearrange the order of the widgets you’ve selected by dragging, moving and dropping within the sidebar section. (Basic Tutorial Video and New Widget System Overview.)
Once widgets have been “installed” you can configure their individual properties by clicking the triangle on the right edge of each widget. Each widget is configured slightly differently depending on what it is supposed to do.
