Requirements
- Applied to Faculty and Department theme, and Child Theme for ok.ubc.ca;
- Enabled the UBCO Indigenous Language plugin;
- Enabled the Pods – Custom Content Types and Fields plugin (depending on the option you choose below);
Recommended Usage
The UBCO Indigenous Language plugin enables website pages to incorporate a shortcode for pronouncing Indigenous languages and offering descriptions of Indigenous words.
How to configure the UBCO Indigenous Language plugin:
- Navigate Settings > UBCO Indigenous Language > input Data source domain > Save Changes.
Note: please make sure you activate the UBCO Indigenous Language plugin.

How to add an Indigenous Language:
Option 1: Select to integrate Indigenous languages from a website that has Indigenous language data sources.
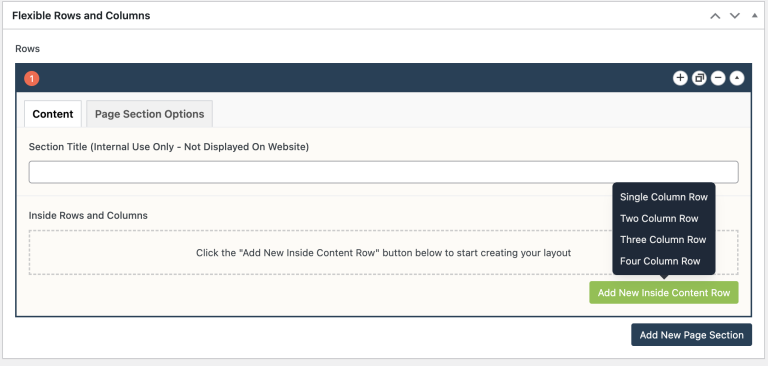
- Add a Page Section.
- Click Add New Inside Content Row and select any column row.

- Click Add Component button > select Standard Editor.
- Click Add Indigenous Language button above the visual editor.
Note: If you could not see Add Indigenous Language button, please redo the step 1. - Select the Indigenous words alphabetically from the dropdown selector in the popup window.

- Click Insert.
Option 2: Select to integrate Indigenous languages from a website that does NOT have Indigenous language data sources. Indigenous language data sources will need to be created first.
How to create Indigenous language data sources?
- Please submit a ticket to request setup the custom post type for indigenous language. If the plugin is already activated, you may disregard this step.
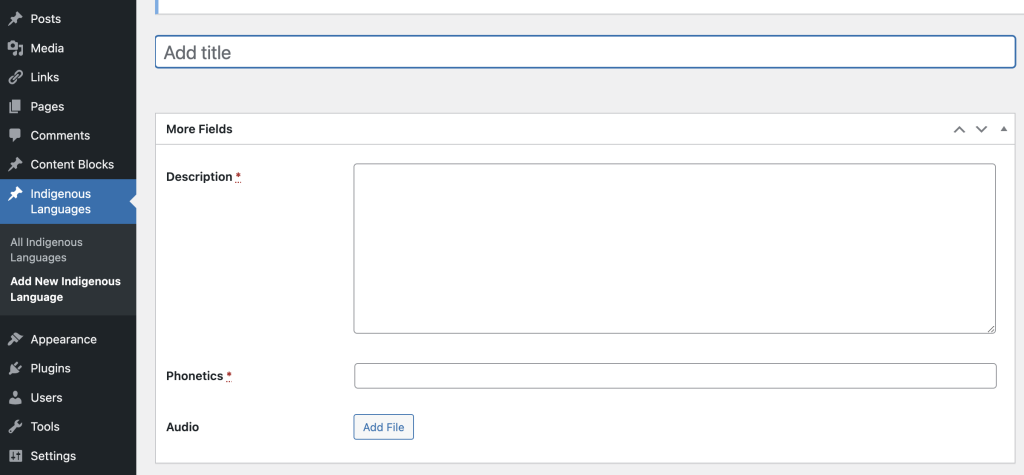
- Navigate to Indigenous Languages on the left menu bar > Add New Indigenous Language > Input required contents.

- Click Publish on the right-hand panel.
- To add an Indigenous Language, please follow option 1 instructions.
Do’s and Don’ts
- BE CONCISE.
- Be cautious when editing an Indigenous language data source, as it may affect other websites that utilize it.
- Like every other component, do not overuse UBCO Indigenous language plugin.

