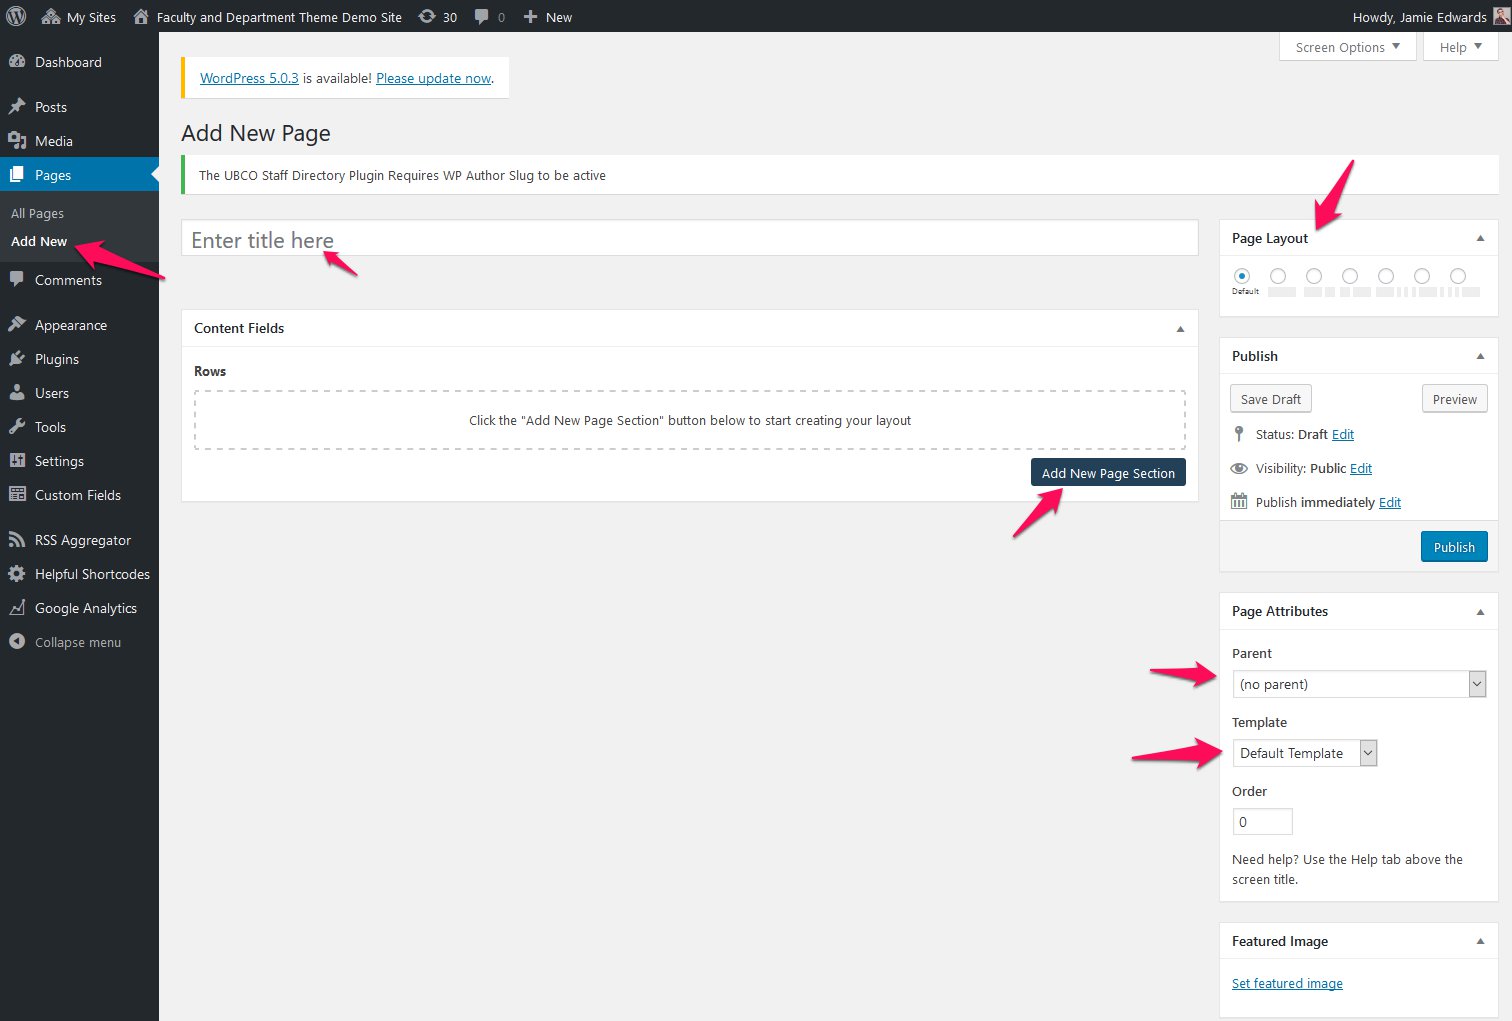
Screenshot showing the Add New Page screen.
Getting Started
Below are the basic steps to follow when creating a new page on websites using the Faculty/Department Theme.
-
Add New Page
-
Name your Page
- Check Permalink name
- Check Parent pages
-
Select desired Template
- Homepage
- Full-width template
- Featured Header
- Used only once per site for the homepage
- Landing Page
- Full-width template or can be used with optional sidebar navigation
- Featured Header
- Used for top-level ‘parent’ landing pages
- Default Page/Third Level Page
- Used for 2nd, 3rd level ‘child’ pages with sidebar navigation
- No Featured Header option
- No Title
- Default page title is hidden from top of page
- For 2nd, 3rd Level pages or deeper with optional sidebar navigation
- No Featured Header option
- Standard WP Page
- Standard WordPress Visual Editor only. No components or page sections available.
- For 2nd, 3rd Level pages or deeper with optional sidebar navigation
- News Page
- Page with collection of featured stories
- Featured News Story set by assigning as ‘Sticky’ post
- Stream of six (6) most recently published posts and one (1) Featured Story at the top of page
- Page Sections and Components available below news posts
- Homepage
-
Create Page Sections
- Page section
- Lead paragraph
- Photo bar
-
Select number of Columns
- Full width column 100%
- Two-column 50/50, 66/33, 60/40
- Three column 33/33/33, 25/25/50, 50/25/25
- Four column 25/25/25/25
-
Add Components inside the designated columns
- Single column has most components available, followed by two column, etc
- Fill out labels, text, and image fields available for each chosen Component
-
Adjust margins and padding, image background, or colour background in Page Section Options as desired.
-
Repeat Steps 4-7 to add new sections and layouts until your page is complete.
-
Preview/Update frequently before publishing, to test appearance of your page.
-
Have fun!
Availability
This is based on the Faculty and Department theme.